
Serving Data With ExpressJS | Quiz API Tutorial
Please share this post if you enjoy it!
Getting our data on
In the original AngularJS quiz app tutorial I just pasted the data we used for the facts and quiz into the data service. This series is obviously dealing with the creation of an API to serve that data. That would involve storing the data in a database and fetching it when the user requests it.
The database is something we will cover in the next part of this series. For now I am going to take the same data we had in the data service and paste it into a file on the server that we can pull from and serve via an API route.
This is illustrating the idea of incremental addition of features. Too often people attempt to implement everything at the same time and it gets massively overwhelming and they invariably give up and assume programming isn’t for them. A key is to break the problem down into manageable chunks and go from there. That is what I am trying to do with this series.
So instead of introducing the database immediately, we will build with hardcoded data but keep in mind that we will have a database in the future and build accordingly (what I mean by this will become obvious is a few paragraphs).
Get the data
I will start by creating a file called data.js. The data itself is three arrays each corresponding to facts about turtles, quiz questions and answers to those quiz questions respectively. We will export the three bits of data by placing the following code into data.js:
module.exports = {
  turtlesData,
  quizQuestions,
  correctAnswers,
}
Being mindful of future features
At this point it would be tempting to create some routes to serve back the data, simply import the data from data.js and send it back upon each request from the user. Obviously this will work just fine. But I mentioned above that we need to keep in mind that we will be introducing the database soon.
The problem with just importing the data and sending it back is it is a synchronous event and our future feature (adding a database) is an asynchronous action. If we simply import and send back the data, when we actually add the database, we will have to change all the code we just wrote to now use an asynchronous function that calls off to the database. This function will likely use promises to deal with the asynchronous nature of the request.
However, if we are mindful of that upcoming feature, we could design our current system in a way that reduces the friction when we actually add the database.
To do this we could create a few functions that simulate the asynchronous nature of a database request using promises that immediately resolve to the data from data.js
Model functions
Create a folder called models/ where we will put these functions. Inside there I created two files: facts.js to deal with the data pertaining to the facts section of the app and questions.js to handle the data for the quiz itself.
Staring in the facts.js file we can import the turtlesData array from data.js like so:
const { turtlesData } = require('../data');Now we can use that data inside a function that uses an immediately resolving promise to simulate the database.
function getTurtleData() {
  return Promise.resolve(turtlesData);
}
By the way, if you don’t understand promises, I will be doing an in depth course on then very soon
Obviously, this request isn’t actually asynchronous but by using Promise.resolve() we can simulate a real asynchronous event. Now when we call the getTurtleData function, we can treat it like an actual asynchronous event that uses promises and call .then() to get the data returned from it.
This means that the function footprint doesn’t need to change when we actually add in the database. When we add in the database, we just need to change the code inside the function and as long as the function returns a promise none of the code that consumes that function will have to change.
In this way we have reduced the friction when adding in the new feature by being mindful of the features we will be adding in the future without having to sacrifice the ability to break the problem down into small chunks. It isn’t that much extra work to create these stub functions to simulate the database request, but it saves us a huge amount of time in the future when we actually implement the support for the database.
Export the function
Now that we have the stubbed function, we should export it. This leaves our models/facts.js file looking like this:
// models/facts.js
const { turtlesData } = require('../data');

module.exports = {
  getTurtleData,
}

function getTurtleData() {
  return Promise.resolve(turtlesData);
}
Use the model function in a route
We have the data and a model function to fetch that data using a promise interface. Now let’s use that in a route to serve the data back to the client.
Inside the routes/api.v0.js file we can add a router.get call to listen for GET requests to the ‘/data’ route and serve back the facts data.
router.get('/data', dataHandler);

function dataHandler(req, res) {
  // code here
}
You may notice that I didn’t use an inline arrow function as the handler callback this time but instead used a named function called dataHandler and defined that function separately.
This is totally a personal preference thing and you can use an inline arrow function if you want to. I just prefer to do it this way because then I can see at a glance the interface of my API ie all the routes I am listening to without having to see the implementation of each. If I want to see the actual implementation of a certain request handler I can scroll down the page and see the named function that implements it. Doing it this way also allows you to be more descriptive about what is going on by using informative function names.
Import the model function
To actually send back the data we need to import the model function so we can get hold of the data and then send it back.
At the top of the /routes/api.v0.js file add the following:
const { getTurtleData } = require('../models/facts');We have access to the model function so we can now implement the dataHandler function.
function dataHandler(req, res) {
  getTurtleData()
    .then(data => {
      res.json(data);
    });
}
We used the .then because we created the getTurtleData function to return a promise. Then we use the res.json method to return the data as json to the user.
You have seen the res.send in an earlier part of this tutorial and res.json is very similar but it will format the response correctly as json whereas res.send makes no assumption about data type. So if you know you want to return json it is best to use res.json.
The whole routes/api.v0.js file looks like this now
// routes/api.v0.js
const express = require('express');
const router = express.Router();

const { getTurtleData } = require('../models/facts');

router.get('/data', dataHandler);

module.exports = router;

function dataHandler(req, res) {
  getTurtleData()
    .then(data => {
      res.json(data);
    });
}
Checking it out in the browser by going to http://localhost:8080/api/data we see the following output:
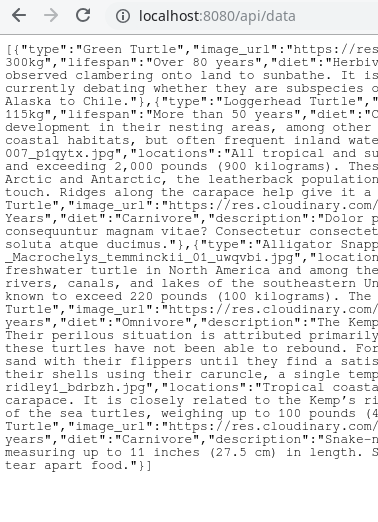
As an aside, the output doesn’t look very nice, we can change that by adding this into the main app file after the const app = express() line:
app.set('json spaces', 2);This isn’t really advisable if you are using this app in production, but it can be nice during development just so you can see the data a little better. In production there is no need to have extra whitespace, it is just taking up space.
This does show you a new method on the app object though - app.set(). Which can be used to set global configuration settings.
Rinse and repeat
Just repeat the same process to create the model functions in the models/questions.js file and to create the route handlers to serve that data back.
I will just show you the end result of the files here:
// models/questions.js
const { correctAnswers, quizQuestions } = require('../data');

module.exports = {
  getCorrectAnswers,
  getQuizQuestions,
}

function getCorrectAnswers() {
  return Promise.resolve(correctAnswers);
}

function getQuizQuestions() {
  return Promise.resolve(quizQuestions);
}
// routes/api.v0.js
const express = require('express');
const router = express.Router();
const { getTurtleData } = require('../models/facts');
const { getCorrectAnswers, getQuizQuestions } = require('../models/questions');
router.get('/data', dataHandler);
router.get('/questions', questionHandler);
router.get('/answers', answerHandler);
module.exports = router;
function dataHandler(req, res) {
getTurtleData()
.then(data => {
res.json(data);
});
}
function questionHandler() {
getQuizQuestions()
.then(data => {
res.json(data);
});
}
function answerHandler() {
getCorrectAnswers()
.then(data => {
res.json(data);
});
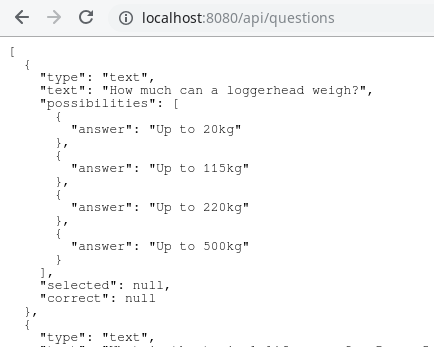
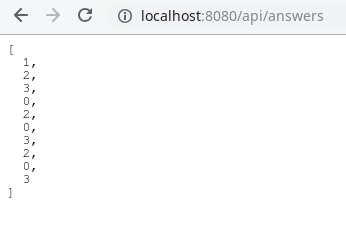
}This will nicely display the questions and answers when we go to http://localhost:8080/api/questions and http://localhost:8080/api/answers respectively:
With that we have implemented the data model and serving of that data to the client.
In the next part we will be adding Mongodb into the mix as a database to store the data and use that to fetch the data every time a user makes a request.
Stay hungry, and keep coding.
Adrian
Please give this post a share if you enjoyed it. Everyone needs that awesome friend to send them amazing stuff.